CNC Knurling – Everything You Need to Know
CNC Knurling is a vital process in modern manufacturing. It gives a better grip, is safe and makes parts look better. In order to attain accuracy and fine finish, it is important to understand what is a knurl. Here, you will get to know its basics, tools, and techniques. It also comprises optimization tips and pitfalls to avoid. At the end you will be able to know how to knurl on a lathe in your projects.
What is Knurling?
Knurling is a surface texturing process that produces patterns such as grip patterns for enhanced grip and anti slip properties. You can see it commonly on tool handles or mechanical parts. Manual knurling differs from lathe knurling due to its lack of precision and consistency. This is very critical for functional design and ergonomics to make parts easier and safer to handle and optimizes performance and user experience. You should also define knurling to understand the surface pattern principles.
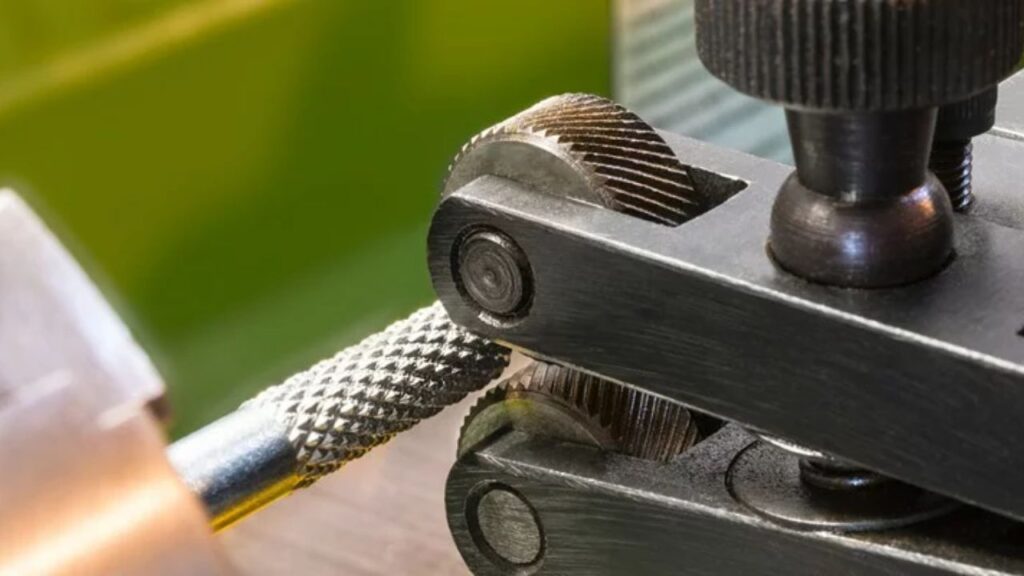
The CNC Knurling Process: Step-by-Step
Step 1: Tool and Material Setup
Select the correct knurling tool for lathe for your project based on what your material is made of and what design you need. Choose the knurling tool with the correct material fit first then pick from diamond, straight or special pattern designs. You must hold the tool in a straight line against your workpiece to achieve good quality results.
Step 2: Tool Engagement
Place the knurling on a lathe tool into the rotating material. You need to set the tool movement to match the rotation speed and feed rate of your workpiece to create the desired textures.
Step 3: Modify your tool settings
Use the correct amount of force on the knurling tool lathe to achieve perfect results. Adjust your tool application force to match the hardness of materials to produce flat patterns without surface damage.
Step 4: Pattern Formation
The tool starts creating the chosen pattern on the workpiece when it makes contact and spins its wheels. Once touching the workpiece the tool creates a surface texture that matches the chosen design. This process produces knurls that are precise and uniform.
Step 5: Post-Knurling Inspection
Examine if the entire surface area shows the same knurl texture at completion. Check the pattern depth with calipers to ensure your product matches your exact specifications. Our final review confirms both the specified technical specifications and meets professional standards.
Types of Knurling Techniques
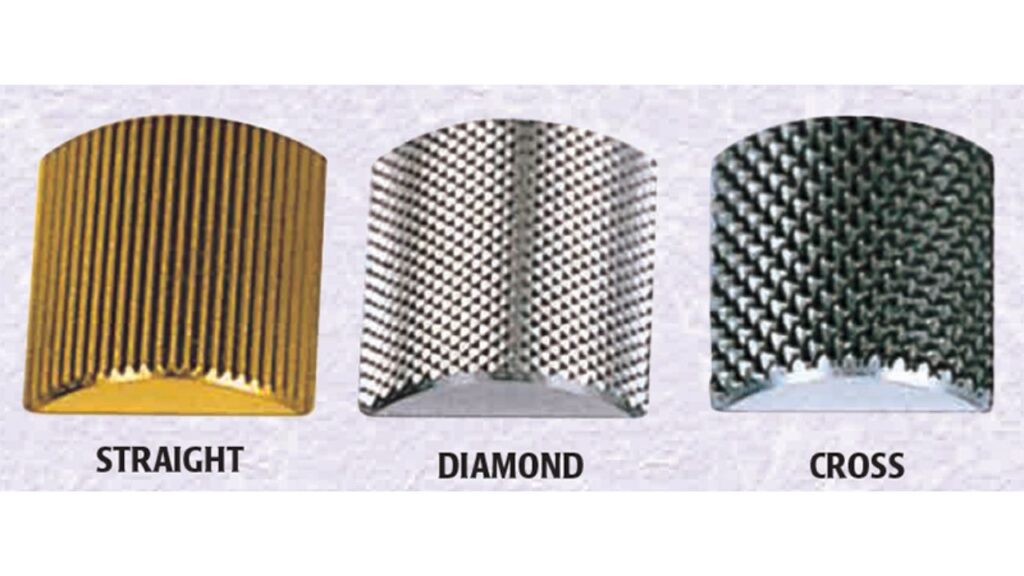
Straight Knurling
Parallel vertical lines are created on the surface by a straight knurling tool. This technique is commonly used on items such as handles and levers. Also, straight knurling is easy to align to ensure you get a consistent grip. It is often chosen for its practicality and basic functionality as a simple effective texture for grip.
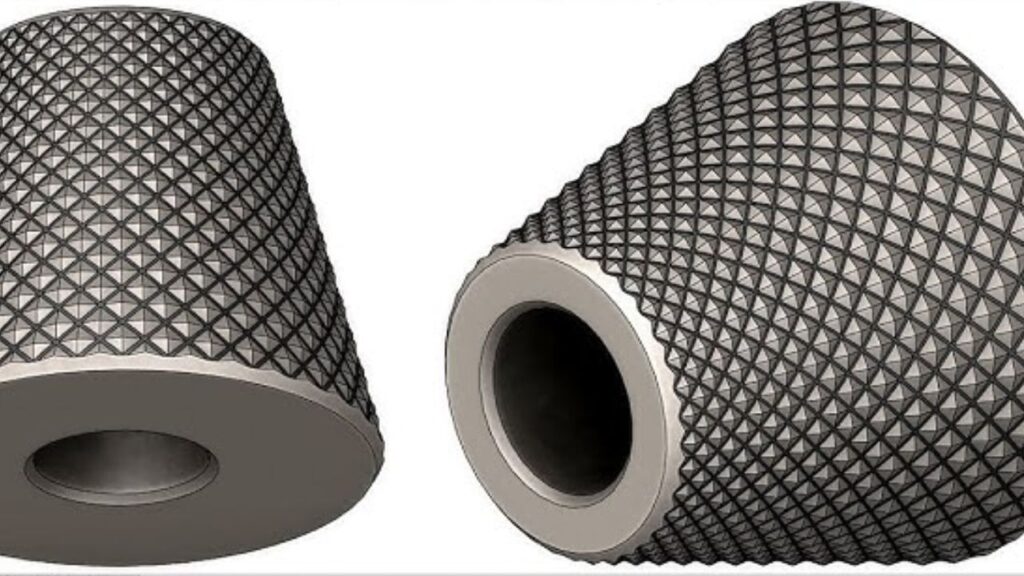
Diamond Knurling
Diamond knurled knurling forms intersecting diagonal lines that look diamond shaped. This technique is suitable for anti-slip surfaces such as tool handles, industrial fasteners. Diamond knurling is advantageous in that it offers improved traction. At the same time, the aesthetic appeal of diamond patterns is also much appreciated in many industrial designs.
Circular Knurling
These grooves are circular knurling. It is widely used in both decorative and functional products in consumer goods. Circular knurling, as the name suggests, offers low grip compared to other types but high aesthetics, and this is why it found use in products like decorative knobs or rings. Gnurling is another term sometimes used for circular knurl patterns.
Helical/Spiral Knurling (Advanced)
Special mechanical applications require helical or spiral knurling. In high speed or rotating components where continuous contact is needed, it produces a spiral pattern that can be very beneficial. This technique guarantees durability as well as smoothness of parts that run in constant motion, like gears or shafts.
Types of CNC Knurling Tools
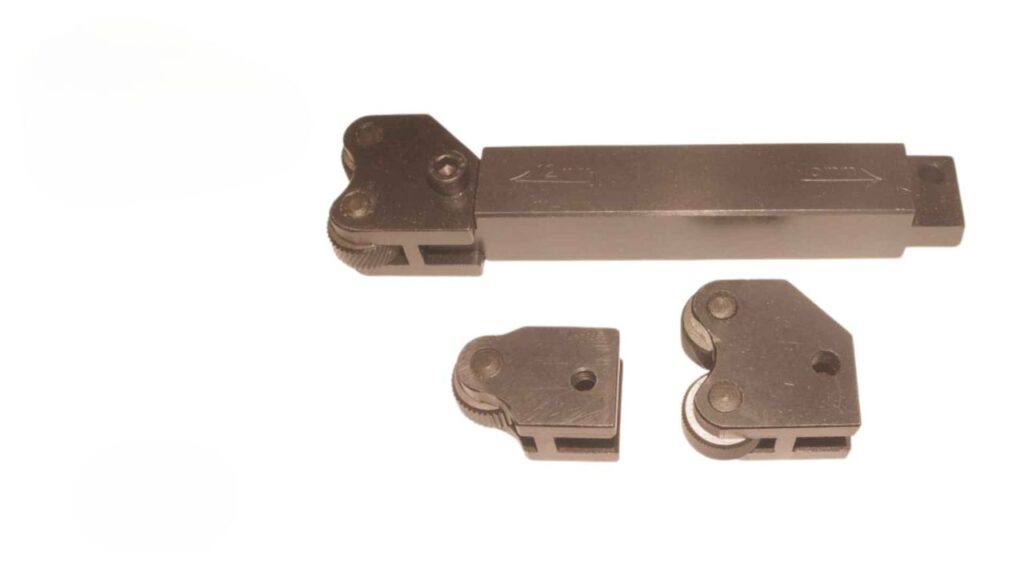
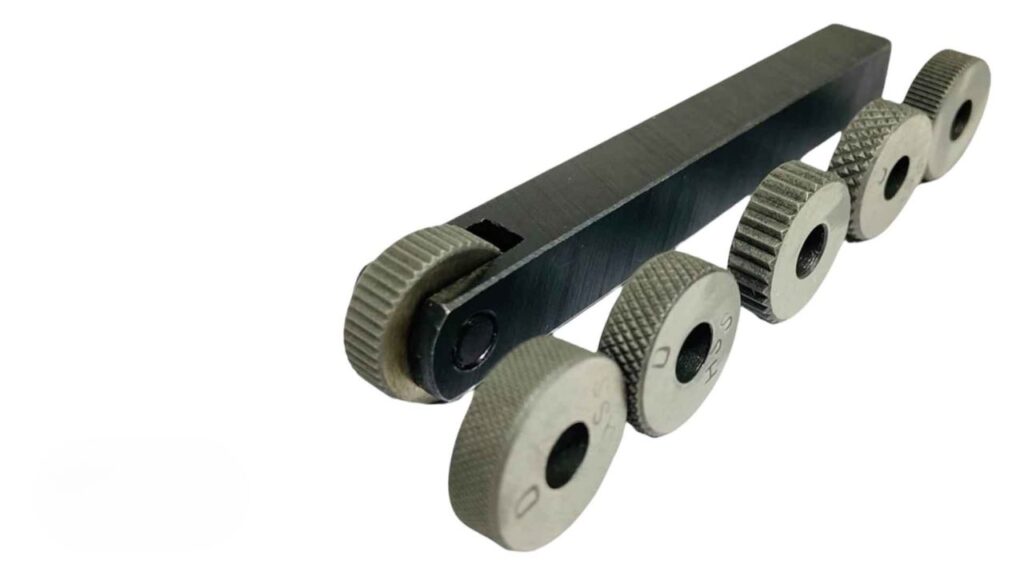
Knurling Wheels
Knurling wheels are rotating tools with engravings that help create exact textures on cylindrical parts. Rods and shafts are commonly used for them. There are wheel types such as medium text, coarse text and fine pitch that you can select from. Each type makes its own pattern and surface finish so that you can get the grip or appearance on your work pieces that you want.
Knurling Inserts
Replaceable tools that quickly switch patterns are known as knurling inserts. High wear applications have made them ideal, and they are often used in modular tool holders. Knurling inserts give you flexibility and efficiency in production. This is because they can be easily adjusted without having to replace the whole tool, which is ideal for businesses that need to flex their machining operations.
Knurling Dies
Large volume or heavy duty knurling operations use knurling dies, fixed tools. They are used often in press operations for non rotational parts. Knurling dies are important for large parts and for high volume production runs as they provide durability and consistent results.
Push-Type Knurling Tools
Knurling tools that push can be used for softer materials or short parts. These tools provide gentle pressure, quick setup and minimum deformation of workpiece. If you require speed and less setup time, push type tools are a good option.
Floating Knurling Tools
Self aligning floating knurling tools are used for uneven or slightly varying diameters. This cnc knurling tool can adjust for slight misalignments if you’re working with CNC machines, which have a high tolerance. If precision is critical, floating knurling tools are an essential option.
Cutting vs. Forming Tools
Cutting and forming knurling tools can be classified. While cutting knurling chips the material to cut the pattern, and forming knurling displaces the material to form the pattern. It depends on the material and finish that’s needed. It is very important to choose the proper tool in order to achieve a smooth finish and not damage the workpiece.
CNC Parameters and Optimization for Knurling
Speed and Feed Rate Considerations
In knurling, maintaining the speed and feed rate is vital for clean and precise pattern. The recommended RPMs vary depending on the material you are working with. Higher RPMs are often suitable for softer metals like aluminum or brass. For harder materials like steel, lower RPMs are generally needed to prevent tool wear. The feed rates vary depending on the knurl pattern and size. Generally, slower feed rates are required for larger patterns to achieve uniformity and proper depth.
Tool Pressure and Engagement Depth
A successful knurl is all about the amount of pressure you apply gradually. Distortion of the material or wear of the tools may result from excessive pressure. However, insufficiency of pressure causes incomplete knurling. The knurl needs to be at just the right depth—you go too deep and you risk damaging the machine, too shallow and it won’t knurl properly. Tool pressure should always be monitored and adjusted accordingly.
Material Suitability
Not all materials are suitable for knurling. Some of the best for this process are aluminum, brass, and mild steel; they produce clean and consistent patterns. But stainless steel and hard alloys have their drawbacks because of their hardness. Such materials often necessitate specialized tools and lower RPMs to protect the tools from excessive wear.
Surface Finish and Post-Processing
Burrs and sharp edges caused by knurling need to be reduced in order to achieve the most optimum surface finish. This can be achieved using a deburring tool or a fine grit abrasive. Smooth, refined textures are achieved by tumbling or hand polishing. Proper define knurled surfaces enhances both aesthetics and safety.
Applications of CNC Knurling
Functional Applications
CNC knurling increases grip on tools and machine parts. It prevents slippage, meaning your control knobs or surgical tools will stay firm and precise. Knurling is added to provide textured patterns to ensure a secure hold even under pressure. In automotive or medical applications, you experience improved handling and reliability.
Aesthetic Applications
Visual appeal is also added to products with the help of precision knurling. But you’ve probably seen it in luxury pen barrels or on high end audio components. In addition to looking nice, these intricate patterns give the product the feeling of a very refined texture. This is an aesthetic function that will make your product move up on the ladder in the market.
Mechanical Applications
Knurling serves mechanical purposes too. It is used commonly in press fit surfaces and interference fits. Knurling increases friction, and the mating components stay in place. For example, in high stress environments, ensuring durability and functionality in your parts requires it.
Industry-Specific Use Cases
CNC precision knurling is a process used across many industries. It is found in aerospace on throttle levers and valve grips. Shift knobs and control dials in automotive can gain improved grip. Knurling is used for precision on surgical instrument grips for medical devices. It is employed for stability of knobs, dials, and connectors in industrial machinery.
Tips to Achieve a High-Quality Knurled Finish
Proper Tool Geometry and Material should be used.
Make sure your knurling tool is made specifically for the task at hand. Decide what kind of geometry will work best for the material that you’re dealing with. It helps to minimize tool wear and produce a clean, uniform finish. The more accurate the results are when using a well chosen tool geometry.
Material Hardness and Match Tool Pressure
Adjust the pressure you apply depending on the material’s hardness. Less pressure is needed for softer materials, more force for harder materials. Too much over pressure can damage the tool and workpiece so find that balance for your material.
Inspect Frequently and Keep Tool Sharp
When a dull tool is used for knurling, the quality is poor. Regularly inspect and keep your tool sharp to avoid damage to your material. A sharp tool will give you a more precise, cleaner finish with less rework.
Maintain Precise Alignment and Symmetry
A consistent knurled finish is dependent upon proper alignment. Both tool and workpiece must be aligned symmetrically. Uneven pressure is caused when misalignment occurs, resulting in a subpar finish.
Minimize Tool Wear Using Lubricants
Use lubricant to reduce friction and wear of the tool. Lubricants are used to increase tool life, to maintain a smooth operation, and provide a better finish. They also aid in heat dissipation and do not contribute to tool damage.
Pass a Test on Scrap Material
Run a pass on scrap material before working on the final piece. It gives you the ability to adjust settings and make sure it comes out exactly how you want it to. It is a simple but effective way to avoid mistakes and costly errors.
Clean Chips and Debris During Long Runs
The knurling process is prone to chip and debris interference. Clean them regularly during long runs to keep tool efficiency and finish quality. It prevents clogging and provides consistent results by the time the process is completed.
Common Defects in CNC Knurling and How to Avoid Them
Incomplete Knurling
With incomplete knurling, half of the pattern does not form. This is usually caused by poor pressure or shallow engagement with the workpiece. To prevent this the tool pressure should be adequate and the engagement depth should be adjusted accordingly. Also, you should ensure that the feed rate matches the material and tool type.
Pattern Overlap or Misalignment
When the knurling tool is not moved in time with the workpiece, misalignment or pattern overlap occurs. Keep in mind to modify the timing and speed settings so as to prevent this. The workpiece will also be stabilized securely which will reduce the risk of misalignment and overlapping resulting in a clean, uniform pattern.
Uneven Depth and Poor Grip
An uneven depth can cause poor control of the workpiece. This normally takes place when feed consistency or clamping is not uniform. By checking the feed rate regularly and getting proper clamping, you can avoid this. The workpiece must be held tightly in place during the process otherwise it will shift.
Tool Chatter and Surface Distortion
Vibration during knurling causes chatter which distorts the surface. Proper tool holders that limit tool movement can minimize vibrations. Maintain the cutting speed and pressure so as to prevent the distortion and get a smooth, accurate surface.
Tool Wear and Dulling
Long term, tools will wear out and provide poor results. Dull tools need frequent inspection to be identified. To avoid this, replace the tools at regular intervals. Maintaining consistent quality in your work will also use high-quality tools, and extend their lifespan.
CNC Knurling Best Practices
Knurl pitch will match the part diameter.
Make sure the knurl pich matches the part diameter for maximum grip and finish. Inaccurate results such as improper knurl alignment or weak patterns can occur if there is a mismatch. Pay attention to the size for a clean and an effective knurling process.
Feed/Speed Settings are used with Machine Charts
It is always safer to check the machine charts for correct feed and speed settings. These charts are what ensures smooth operations and prevent tool wear and damage to parts beyond their intended capacity.
Secure Tooling Tightly to Minimize Vibration
Secure tooling properly so vibration isn’t an issue when knurling. Vibration also distorts patterns causing poor quality results. Before starting production, tighten tool mounts and make sure they are stable.
Check Tolerances Before Production Runs
Always check tolerances before you start. The part must be within specifications to avoid dimensional errors during the knurling. Early small mistake can waste materials or rework.
Implement Quality Checks Post-Knurling
Perform visual, tactile and dimensional quality checks after knurling. Check that the pattern is consistent and that the finished part meets the specified function and appearance.
Optimal Pattern Matching Train Operators
Train your operators properly on pattern matching techniques. High quality results are produced by skilled operators who work to ensure that mistakes don’t affect part functionality.
Refine Setups Based on Document Tool Wear Patterns
Use track tool wear patterns to plan future setups. Recording wear also lets you adjust feed rates or change tools before problems start, leading to consistent, high quality knurling on every batch.
Conclusion
To sum up, the CNC knurling technique enhances the grip of the part, prevents slippage, and improves both the function and aesthetics of the part. The art of mastering the right tools, techniques and adjustments will give you precision and high quality results. This process require proper training of operators, regular maintenance of the tools as well as optimizing speed, feed rates, and pressure. Following these practices increases efficiency and ensures consistent production using knurling on lathe.